
At LinuxCon, I won a Raspberry Pi in a raffle, and someone suggested that I make an Amazon Echo with it.
There are two sets of instructions for making an Echo from a Pi.
There’s the set from Amazon, at https://github.com/alexa/alexa-avs-raspberry-pi/blob/master/README.md which is about 93 steps, cleverly disguised as 12 steps, and looked way too much work.
Then there’s Sam Machin’s version, at https://github.com/sammachin/AlexaPi which is one step. Sort of.
And there’s a YouTube video – HERE – which every article about this topic links to. The video, while helpful, skips several important steps, and uses the word “obviously” just often enough to make me feel like a drooling idiot. ‘Cause it’s not obvious, that’s why.
However, with persistence, and a lot of guess work, I got it working.
The instructions go something like this, with some of the details filled in.
Obtain a Raspberry Pi. This is pretty much the only step that is actually obvious.
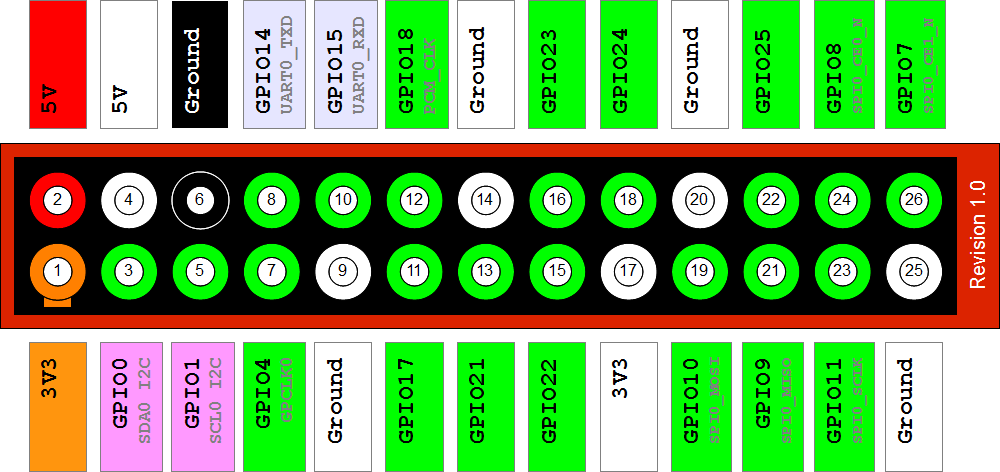
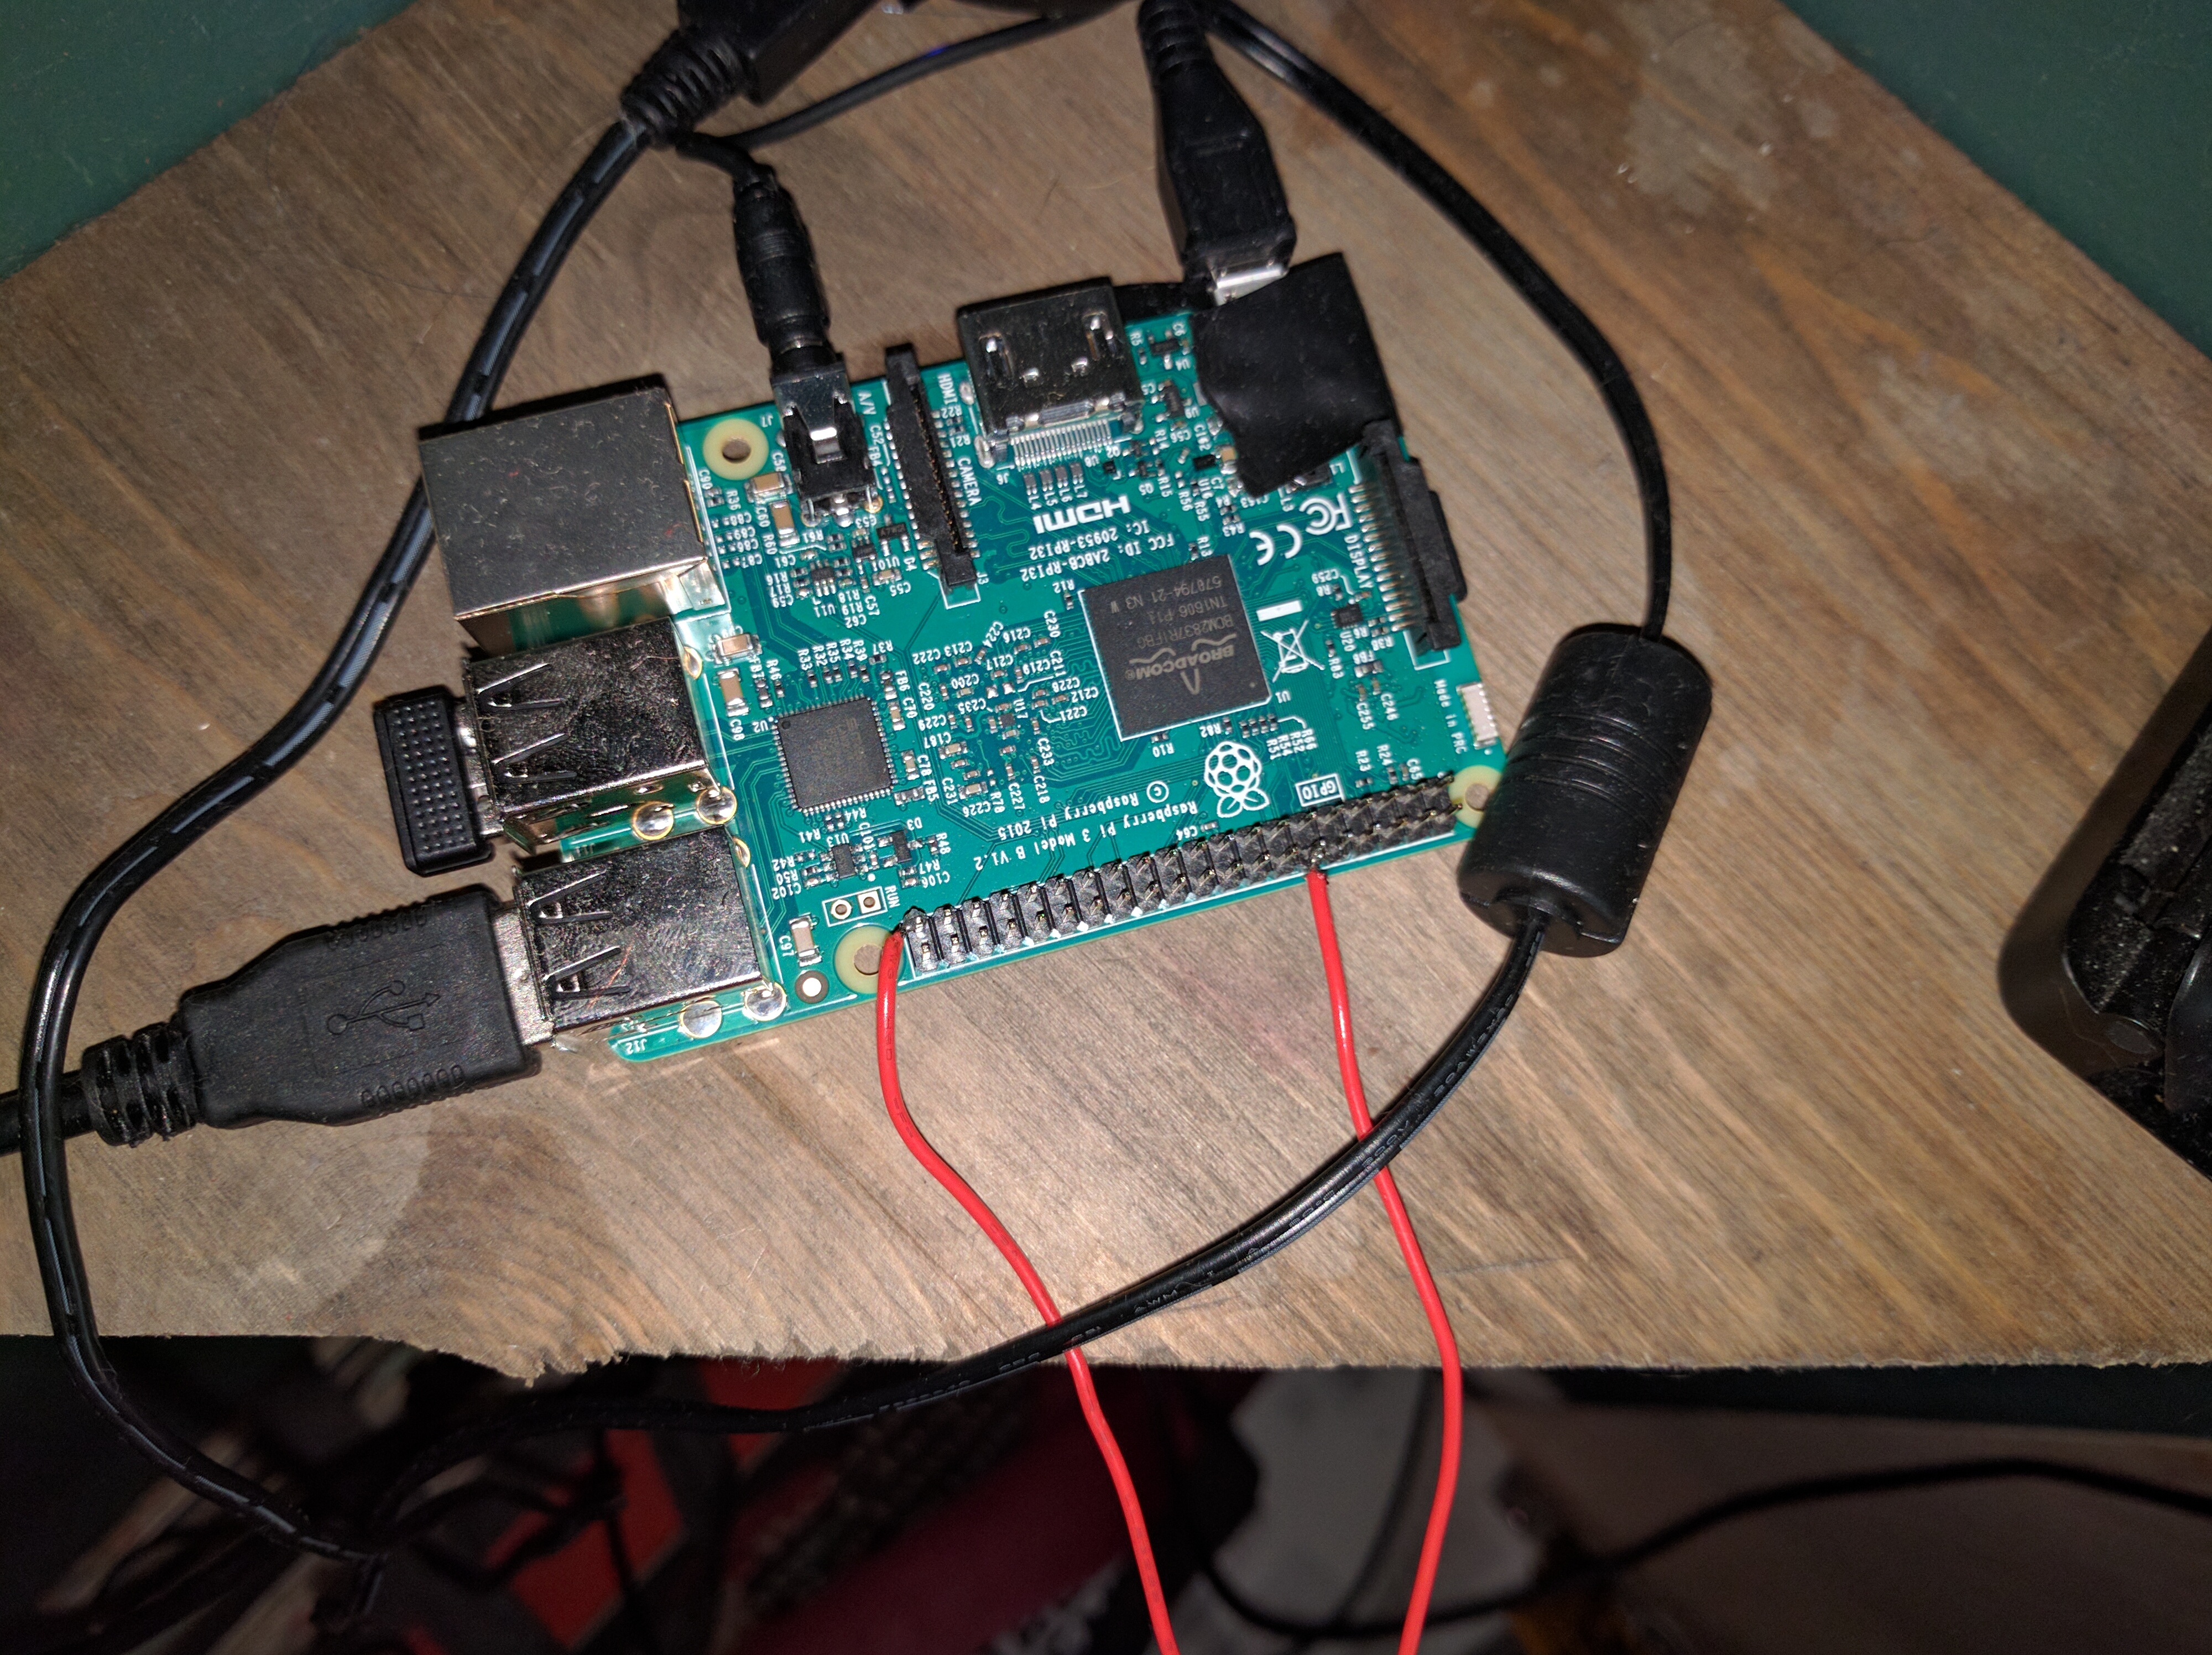
Attach necessary hardware. Plug a speaker into the headphone jack, and a USB mic into one of the USB ports. I used my Samson Go Mic, and a little speaker I wasn’t using. You’ll need to use a powered (amplified) speaker, if you want to actually hear anything. Finally, you need to attach a push-button across two of the pins on the Raspberry Pi board. The pins are BPIO 18 and ground. Pin GPIO 18 is the sixth pin from the top right, when you hold the board with the pins to your right. Ground is the bottom left pin. There’s a diagram of the pins below, as well as a photo of mine.
Note that I soldered the wires to the pins, but there are also slide-on pin jumpers that you can acquire to do this without soldering. I just didn’t have any handy.
You can use any simple electronics kit pushbutton. I got mine at Radio Shack – you know, when there used to be Radio Shacks. 🙁
Register for an Amazon Echo developer account. You’ll do this at https://developer.amazon.com/edw/home.html#/ and this will give you access to the tools necessary to write your own Alexa apps, as well as to register your Raspberry Pi Echo. Now, go to the 3:44 mark in the video and follow his instructions for registering your device. Give it a name you will remember – I called mine AlexaPi, but anything’s fine. Once it’s registered, leave this browser tab open. You’ll need it below.
Download Noobs – the starter Pi boot image, from https://www.raspberrypi.org/downloads/noobs/ and unpack that zip file onto a micro SD card that is freshly formatted with a FAT filesystem.
Boot the Pi from that card, and follow the instructions to install Raspbian.
Update Raspbian, and install necessary things. SSH to your newly running Pi (your username is ‘pi’, and your password is ‘raspberry’), and run the following commands.
sudo apt-get update
sudo apt-get install git
Now, obtain and run Sam’s code:
git clone https://github.com/sammachin/AlexaPi.git
cd AlexaPi
./setup.sh
This script will walk you through the installation process, and will require information from the Amazon developer website that you have open in your browser. You’ll need the name you gave your device, and three long hex strings (numbers and letters) which you’ll paste into the script inputs. The video says that you’ll need to edit a configuration file, but that’s no longer the case, so I presume that there used to be a bug in the script that is now fixed.
The script will tell you to reboot the Pi. Do that.
When it comes back up, it will be running the Alexa service. You press the button to talk to it, and release to tell it you’re done talking. Ask it for the weather. (You can tell your new Echo where you live in the phone app, so that it gives you your local weather, rather than Seattle, which appears to be the default location.)
This is a picture of the finished product.
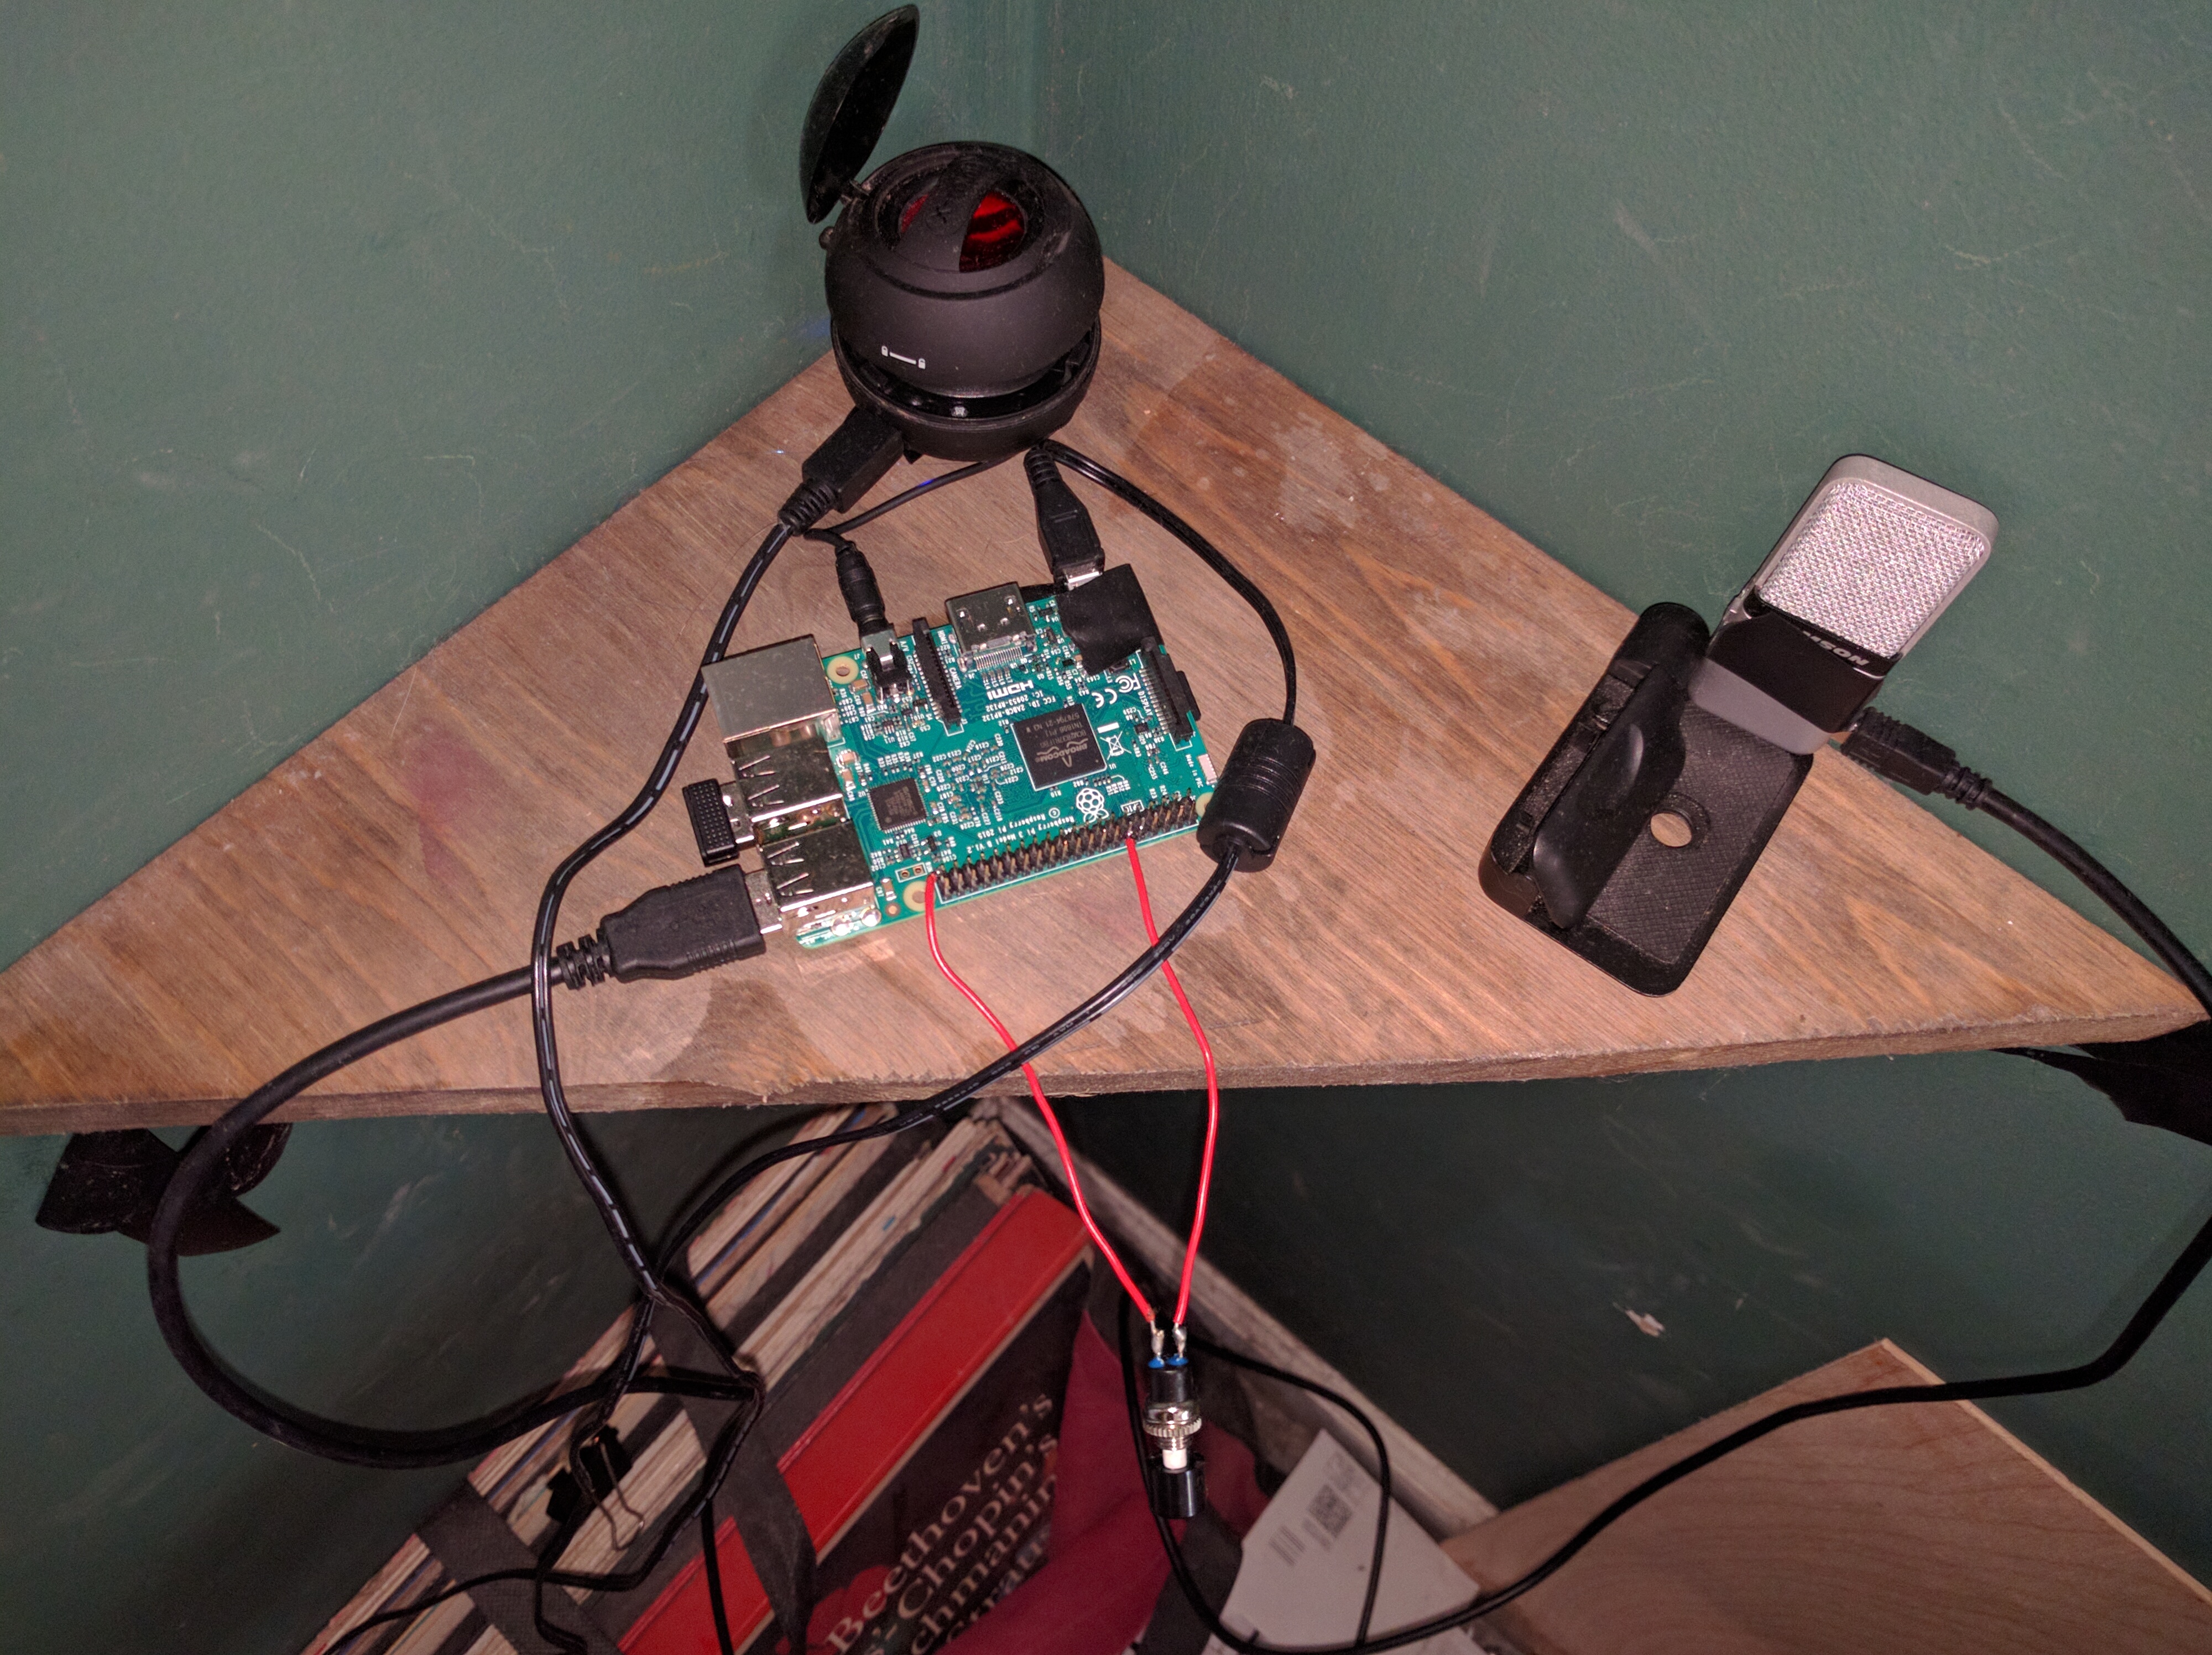
My plan is to attach a nicer button, like, say, one of the Staples “that was easy” buttons, if I can get one back from the kids, and then put the rest of this stuff in a more attractive container. But everything works as desired, with one exception. Turns out that the Raspberry Echo doesn’t have access to the Amazon music services, so you can’t actually play music from Prime Music, Pandora, or other music services that are available from the “real” Echo. It’s still a very useful, and cheap, alternative to buying an actual Echo. I did all of this with parts that I already had laying around, and a Pi that I won in a raffle, so it was essentially “free”. But if I had to guess, I’d say you could do the whole project for under $75, including the Pi, a USB mic, and a speaker. Perhaps a little more, depending on what mic and speaker you go with.
If I missed any steps, please let me know, so that I can update the article. Thanks.