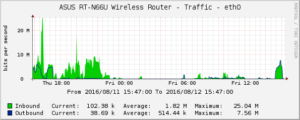
I discovered a few days ago, quite by accident, that the Cacti project is still quite alive and well. I don’t know why I thought it wasn’t. I thought it would be kind of cool to set it up to graph my network traffic here at home.
I have an Asus RT-N66U wireless router, which I’ve been very pleased with since I acquired it.
Step one was getting Cacti running, which has always been something of a challenge. The installation instructions, while extensive, miss a lot of prerequisites that you encounter along the way. (Install packages are not, apparently, available for CentOS7.) Notably, you have to install Spine (the stats collection daemon) from source, and it required the -devel version of several of the items that the docs mention. So, things like php-devel, mysql-devel, snmp-utils, which are not mentioned in the installation instructions. No big deal, but it did make the process a little longer, finding and installing these prerequisites.
Step two was getting file permissions set up correctly in my Apache httpd document directory. This turned out to be a combination of missing directories (log/ and rra/ in Cacti’s home directory) and the fact that my vanilla installation of php had logging turned off, so everything just silently failed. Those directories, once created, and ownership changed to the newly created cactiuser user, Cacti itself started running. Awesome.
Step three is enabling SNMP on the router, which isn’t hard, but is a little time consuming. Instructions for doing this may be found on the My gap in the void blog, and I will not copy them here.
Finally, there’s the step of getting Cacti to talk to the N66U. This turned out to be absurdly easy. Under ‘devices’, I clicked Add. I gave it the name and IP address of the router, and selected “Generic SNMP-enabled Host” from the Host Template dropdown, and pressed ‘Create’.
On the server, in the cactiuser’s crontab, add:
*/5 * * * * php /var/www/html/poller.php > /dev/null 2>&1
Then, click ‘New Graphs’, select the “select all” checkbox, and press ‘Create’.
Finally, under ‘Graph Management’, select the ‘select all’ checkbox, select ‘Place on a tree (default tree)’, and press go.
And, you’re done. Wait a few hours for data to accumulate:

